Using Printers
Remember that you must first send a print job to the PrintLess queue unless you are using other functions at the PrintLess station (scan to UMassD email or copying).
1. Visit a PrintLess printer at any location on campus. The printer panel displays a login message as shown here.
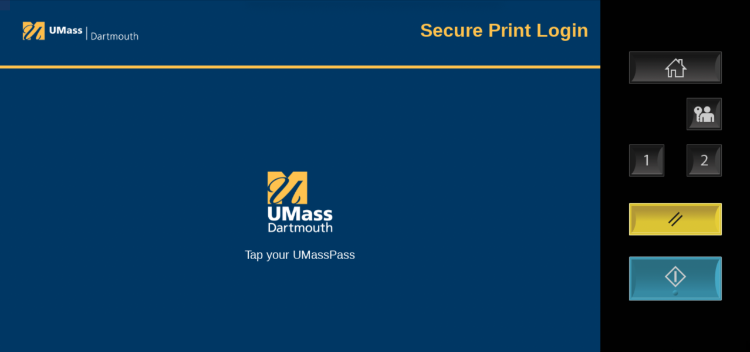
2. Tap your UMass Pass.
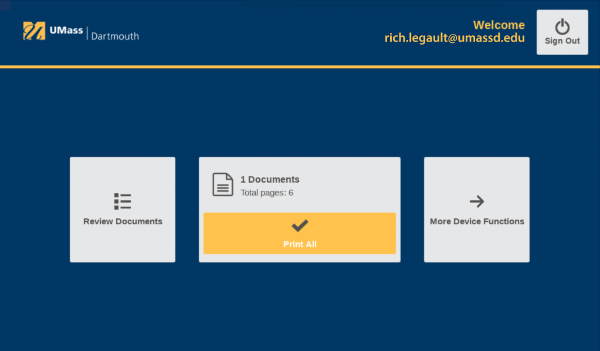
Any waiting print jobs are listed collectively.
Tap the Print All button to print all waiting documents using the default settings.
To select an individual document to print, and to change print settings, tap the Review Documents button.
3. The waiting print jobs list is displayed, as shown here.
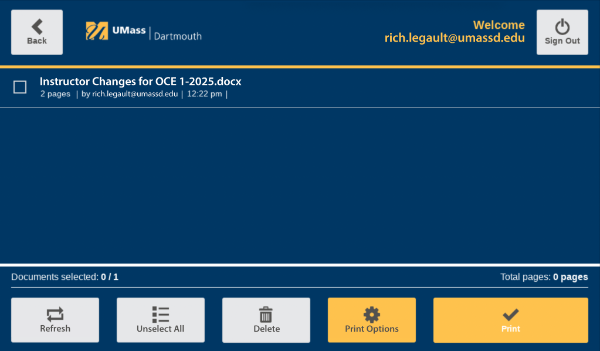
Tap the Refresh button to check for any new print jobs you have recently uploaded.
Tap to select any item in the list.
4. When an item is selected, the other buttons at the bottom become available.
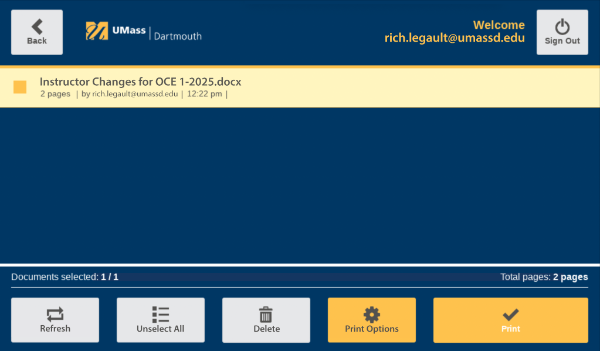
Tap Unselect All to deselect any print jobs you have selected.
Tap Delete to remove the print job from the list. Remember that waiting print jobs are deleted automatically after 48 hours.
Tap Print Options to change the print settings for the selected item.
5. A print options dialog box is displayed.
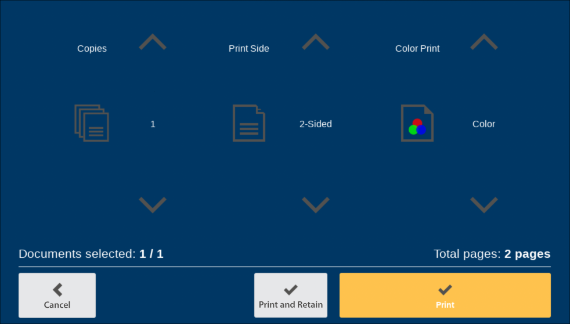
Use the Copies controls to change the number of copies you wish to print.
Use the Print Side options to choose 1-Sided for single-sided printing, or 2-Sided for double-sided printing. 2-sided is the default.
Use the Color pop-up menu to choose between Color and Grayscale printing. Grayscale is the default.
Tap Cancel to return to the list of print jobs.
Tap the Print and Retain button to print the selected item, and keep it in your jobs list until the 48-hour period expires. CITS strongly recommends this option, as it makes it easier to reprint if there is a problem.
Tap the Print button to print the selected item and delete it from the print jobs list.
6. To access other printer features, tap the Back button at the top left of the job list.
7. Then tap More Device Functions on the right side.
8. The printer functions are displayed, as shown here.
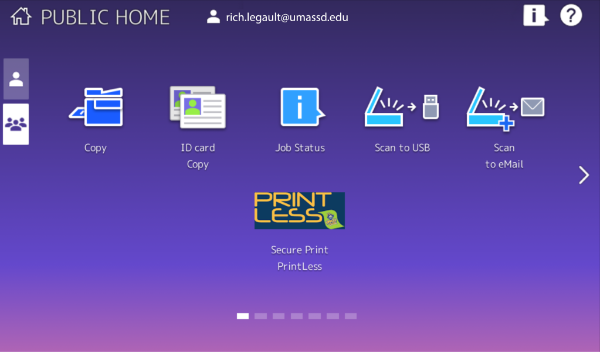
Use the Copy features to make photocopies.
Use the ID Card Copy features to copy an ID card or other small item.
Use the Scan to USB features to scan pages to a PDF file, and save the file to a USB flash drive. Note that the USB port for flash drives is on the left edge of the display panel.
Use the Scan to email feature to scan pages to a PDF file and send the file to a UMassD email address. Scan to email feature will only work with UMassD email addresses.
9. Don’t forget to Sign Out when you’re finished.